
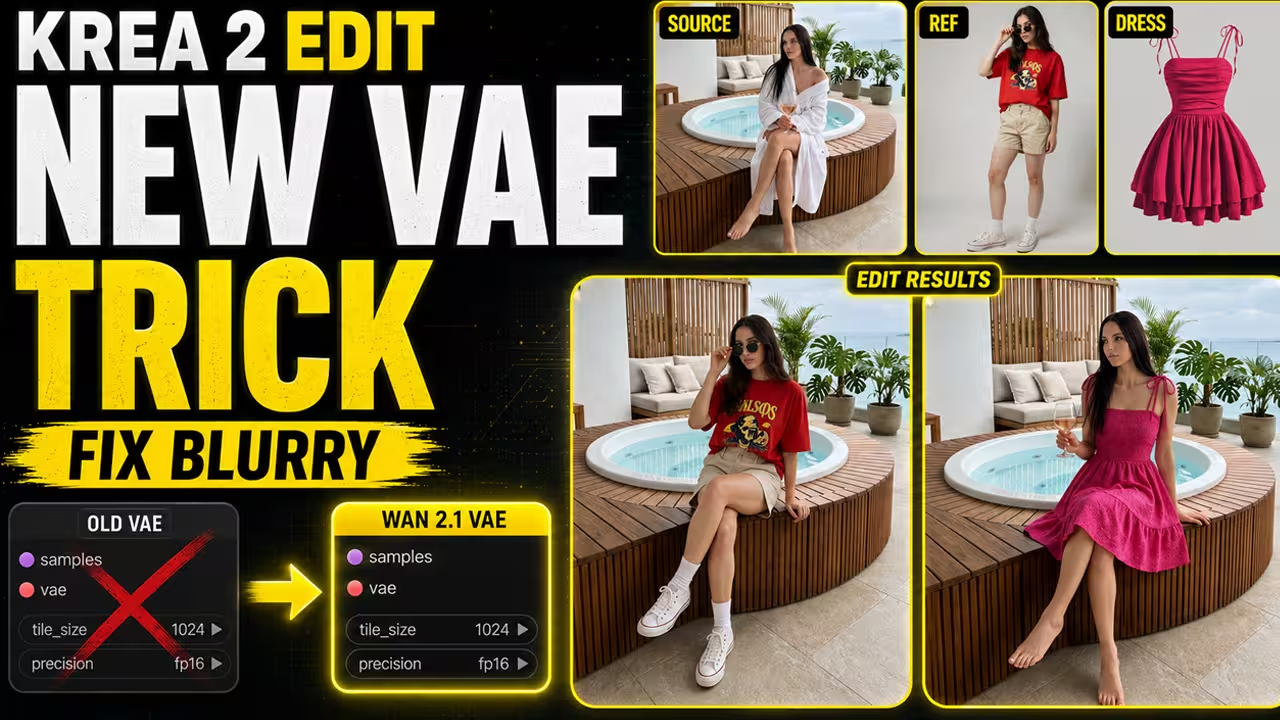
Are your Krea 2 image edits in ComfyUI coming out looking fuzzy, low-resolution, or highly compressed? You are not alone. While local image editing is fantastic for removing objects or adding details, the rendering process often compresses the edited pixels, causing a loss in texture quality. In this step-by-step tutorial, I will show you how to manually install the Krea 2 Edit node suite, configure the exact model and LoRA parameters, and use a Wan 2.1 VAE upscaling trick to make your final edits completely crisp and clear.
What is Krea 2 Edit and Why Your Renders Look Blurry
- Direct Answer: Krea 2 Edit is a local image editing model for ComfyUI designed to let you remove objects, add new details, and edit specific areas of an image. It often creates blurry results because standard inpainting workflows compress the edited pixels, causing a loss in texture quality.
- Simplest Step-by-Step Action: Download the custom nodes from GitHub, load the Krea 2 Identity Edit LoRA, and use the Wan 2.1 VAE upscaler to restore the fine textures.
Local image editing is highly powerful, but traditional samplers struggle to keep textures sharp inside edited areas. When the AI replaces pixels, it often compresses the visual data. This leaves a noticeable, blurry seam between the original picture and the edited section. To fix this, you must change your ComfyUI workflow.
Step 1: Manually Installing the Krea 2 Custom Nodes
- Direct Answer: Because the Krea 2 Edit node suite is unlisted in the standard ComfyUI Manager search registry, you must install the folder manually into your custom nodes directory using your terminal.
- Simplest Step-by-Step Action: Open your command line inside
comfyui/custom_nodes/, run thegit clonecommand for the official repository, and restart your ComfyUI workspace.
git clone https://github.com/[official-developer-link]/ComfyUI-Krea2-Edit
Once you run this command, your terminal will create a new folder named ComfyUI-Krea2-Edit. Restart your ComfyUI application to load the new nodes onto your canvas.
Step 2: Downloading the Required Krea 2 Models
- Direct Answer: To edit images locally, you must load three specific files: the Krea 2 Turbo FP8 base checkpoint, the Krea 2 Identity Edit LoRA (version 1.1), and the Qwen-VL text encoder.
- Simplest Step-by-Step Action: Save the base checkpoint in your
checkpointsdirectory, place the Identity Edit LoRA in yourlorasfolder, and load Qwen-VL into yourclippath.
Load the Krea 2 Turbo FP8 Base Weights First, select the Krea 2 Turbo FP8 Scaled model. This model acts as the fast generator engine, running at a scaled FP8 weight format to save VRAM.
Load the Krea 2 Identity Edit LoRA Next, you need to load the Krea 2 Identity Edit LoRA (version 1.1). This specialized LoRA preserves the identity of your original subject. Set your LoRA strength to 1.0, which is highly recommended for handling large textures.
Configure the Qwen-VL Text Encoder Finally, you must use the Qwen-VL text encoder. Krea 2 does not use standard SDXL loaders. The Qwen-VL model is a vision-language encoder that allows the AI to understand spatial details and edit prompts with absolute precision. Connect this to your positive prompt using a DualCLIPLoader.
Step 3: Setting the Grounding Resolution and Sliders
- Direct Answer: Grounding resolutions define the physical pixel boundary where Krea 2 applies edits, requiring you to toggle between 512 and 1024 depending on the size of the subject.
- Simplest Step-by-Step Action: Set your grounding resolution slider to 512 for small objects or 1024 for large textures, and set your Krea 2 Identity Edit LoRA strength to 1.0.
If you edit a tiny object (like a ring or a watch) using a 1024 grounding resolution, the AI will get confused and render distorted textures. Conversely, large edits (like replacing a jacket or pants) require a higher resolution. Always match your grounding resolution slider to the scale of the object you are editing.
Step 4: The Wan 2.1 VAE Trick to Remove Blur
- Direct Answer: The “VAE Trick” removes all blurriness by taking the edited latent pixels from Krea 2, passing them through a 2x latent upscaler, and decoding them using the Wan 2.1 VAE model to restore fine details.
- Simplest Step-by-Step Action: Add a Latent Upscale node set to 2.0, connect the latent output of your KSampler to it, and decode using the
Wan 2.1 VAEnode before saving.
This is the most critical step of the entire tutorial. The standard Krea 2 VAE tends to output slightly compressed, blurry images. To solve this, we bypass the default VAE and route the generated latent data directly into a 2x latent upscaler.
Next, load the Wan 2.1 VAE model. Route the upscaled latent data through a VAE Decode node using the Wan 2.1 VAE weights. This process forces the AI to rebuild the edited pixels at a higher resolution, completely removing the blurriness problem and producing incredibly clean, detailed textures

