

MiniMax H3 can generate video from text, animate an image, follow first and last frames, preserve characters from reference images, copy motion from a reference video, and use reference audio.
The problem is that running the model locally can be demanding.
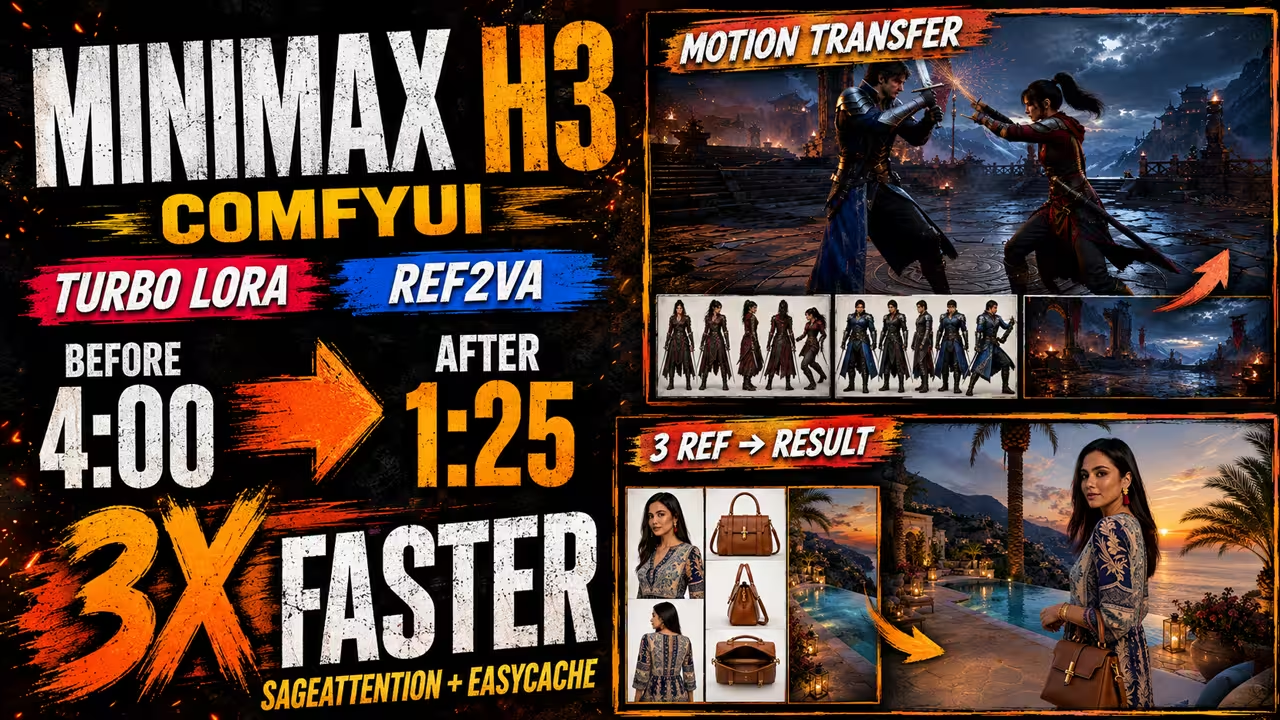
In my own MiniMax H3 ComfyUI tests, I reduced a generation that normally took around four minutes to about one minute and twenty-five seconds. I did this with three changes: the local Patch Sage Attention KJ node, fewer sampling steps, and EasyCache.
That is close to a three-times improvement in generation speed in my workflow.
I also tested the FL2VA and Ref2VA models, multiple character references, motion transfer, reference audio, first-frame and last-frame control, high-resolution generation, face consistency, Turbo LoRA, and several optimization nodes.
This guide explains what worked, what did not work, and the settings I would use as a practical starting point.
Test note: Generation speed, VRAM use, and output quality can change with your graphics card, ComfyUI version, model file, resolution, video duration, and other workflow settings. My timing results are first-hand results from my setup, not guaranteed performance for every computer.
What MiniMax H3 supports in ComfyUI
MiniMax H3 is available in ComfyUI through native workflows for:
- Text-to-video
- Image-to-video
- First-frame video generation
- First-frame plus last-frame generation
- Reference-to-video
- Reference images
- Reference videos
- Reference audio
- Native audio generation
ComfyUI’s current documentation describes MiniMax H3 as an open-weights multimodal model that can work with text, images, video, and audio. The native workflows include text-to-video, image-to-video, and reference-to-video modes.
There are two important diffusion-model groups to understand.
FL2VA
FL2VA is the model family I use for the main generation workflow.
It can handle:
- Text-to-video
- Image-to-video
- First-frame video
- Last-frame video
- First-frame plus last-frame video
The native MiniMax H3 Image to Video node contains first-frame and last-frame inputs.
If both inputs are empty, you can use the workflow for text-to-video.
If you connect a first frame, the model can continue from that image.
If you connect both first and last frames, the model generates the movement between those two images.
The official ComfyUI documentation confirms that the FL2VA weights are used by its text-to-video and image-to-video workflows.
Ref2VA
Ref2VA is different.
Instead of forcing a reference image to become the exact first frame, it lets you give different reference materials different jobs.
For example, you can use:
- One image for a character
- Another image for the environment
- Another image for clothing or a product
- A video for movement
- A video for camera motion
- Audio for a voice or soundtrack
The official MiniMax H3 ComfyUI workflow currently supports up to nine reference images, three reference videos, and three standalone audio references.
This makes Ref2VA one of the more interesting parts of MiniMax H3.
MiniMax H3 model files
The official Comfy-Org MiniMax H3 repository currently contains separate FL2VA and Ref2VA model files, several compressed variants, the Qwen3-VL text encoder, a video VAE, and an audio VAE.
The current repository includes files such as:
minimax_h3_fl2va_bf16.safetensorsminimax_h3_fl2va_pruned_int8_convrot.safetensorsminimax_h3_fl2va_pruned_fp8_scaled.safetensorsminimax_h3_ref2va_bf16.safetensorsminimax_h3_ref2va_pruned_int8_convrot.safetensorsminimax_h3_ref2va_pruned_fp8_scaled.safetensorsqwen3vl_32b_minimax_h3_nvfp4_awq.safetensorsminimax_h3_video_vae_fp16.safetensorsminimax_h3_audio_vae_fp32.safetensors
The full BF16 FL2VA and Ref2VA files are currently listed at about 66.3 GB each in the Comfy-Org repository. The current pruned INT8 and FP8 versions in that repository are about 21 GB.
My workflow also included smaller compressed files around 12.5 GB and a compressed video VAE around 3.17 GB. Treat those as additional workflow-specific compressed options rather than the sizes of the current native Comfy-Org files.
That distinction matters because different repositories and quantization methods can produce different file sizes.
Update ComfyUI before loading the workflow
Update ComfyUI before trying MiniMax H3.
The current official instructions require ComfyUI 0.30.0 or later. After updating, you can open the Template Library, go to the Video section, and find the MiniMax H3 workflows.
For my main workflow, I use the MiniMax H3 Image to Video node.
It accepts inputs for the model components and includes the first-frame and last-frame controls needed for FL2VA generation.
If you want text-to-video, leave both the first-frame and last-frame inputs empty.
Start with a safe resolution
Resolution has a large effect on both memory use and generation time.
MiniMax H3 resolutions should follow a grid divisible by 32. ComfyUI’s Resolution Selector handles this by rounding the generated width and height to the required multiple.
For my first test, I used:
- Aspect ratio: 16:9
- Megapixels: 0.4
- Resolution: 864 × 480
This is a useful preview setting because it needs much less memory than a full-resolution generation.
I also use a Math node in the workflow. I enter the video duration, and the workflow calculates the required frame length.
Moving to higher quality
For a higher-quality test, I changed the target from 0.4 megapixels to about 1 megapixel.
That gave me a resolution close to:
1344 × 768
This is an important resolution for MiniMax H3.
The current ComfyUI documentation describes roughly 1344 × 768 as H3’s native 16:9 canvas, with a 768-pixel short edge.
However, the higher resolution needs much more memory and takes longer to generate.
On my RTX 5090, one five-second test at approximately 1344 × 768 took about four minutes and seventeen seconds before I added the main speed optimizations.
If you have limited VRAM, start at the lower resolution instead of moving immediately to 1 megapixel.
If 864 × 480 still gives an out-of-memory error, you can also test a square resolution such as:
640 × 640
The best resolution depends on your GPU and the rest of your workflow.
How I made MiniMax H3 almost three times faster
This was the most useful part of my testing.
My normal generation was taking around four minutes.
After several tests, I reduced it to around one minute and twenty-five seconds.
I used three main optimizations.
1. Add Patch Sage Attention KJ
The first optimization is Patch Sage Attention KJ from ComfyUI-KJNodes.
Sage Attention changes how attention calculations are performed. It does not compress the MiniMax model itself.
ComfyUI’s official MiniMax H3 guide also recommends Sage Attention as an optional performance optimization and says it can roughly double generation speed with minimal quality loss in suitable setups.
In my workflow:
Without Patch Sage Attention KJ: about 4 minutes
With Patch Sage Attention KJ: about 2 minutes
That was close to a 50 percent reduction in generation time in my test.
I did not notice a meaningful visual quality difference in this particular comparison.
You need the SageAttention library installed before the node can work.
If the node produces an installation or compatibility error, bypass it first and confirm that the normal workflow still runs.
Local SageAttention compared with the global option
I prefer the local Patch Sage Attention KJ node for this workflow.
When I tested SageAttention through the global startup option, my result looked very bad. Using the local KJ node gave me a much better result.
This appears to be specific to my workflow or environment.
The official ComfyUI documentation does support the global --use-sage-attention option as an alternative, so I would not describe the global method as universally broken.
For my production setup, however, I use the local node because that is what worked reliably in my tests.
2. Reduce the sampling steps
My next test reduced the sampling steps from:
20 steps → 15 steps
With SageAttention already enabled, the generation time dropped to around:
1 minute 49 seconds
For draft generations, 15 steps worked well enough for me.
I would still compare the result with your normal settings before using fewer steps for final production.
The important point is that lowering the steps can save additional time after the attention optimization.
3. Add EasyCache
The third optimization was EasyCache.
I placed EasyCache after the SageAttention optimization and ran the same generation again.
My result changed from approximately:
1 minute 49 seconds → 1 minute 25 seconds
I did not notice an obvious quality difference in that test.
That brought the full progression to approximately:
| Test | Generation time |
|---|---|
| Original workflow | About 4 minutes |
| + Patch Sage Attention KJ | About 2 minutes |
| + 15 sampling steps | About 1 minute 49 seconds |
| + EasyCache | About 1 minute 25 seconds |
These numbers are from my own workflow and hardware.
Do not treat them as a benchmark for every GPU.
If EasyCache changes an important detail in your output, disable it and compare the results again.
What about TorchCompileModel?
I also added TorchCompileModel to my test workflow.
The idea is to compile parts of the model so repeated generations can become faster.
I keep this node bypassed in my safer workflow.
Compilation can add complexity, the first run may behave differently, and some systems can produce errors. Test it on a copy of your workflow before depending on it for production work.
My main optimization stack therefore remains:
- Patch Sage Attention KJ
- Reduce the steps when draft quality is enough
- EasyCache
- Keep TorchCompileModel optional
MiniMax H3 image-to-video setup
For image-to-video, I pass the source image through a Resize Image node before connecting it to MiniMax H3.
The resolution still needs to follow the model’s 32-pixel grid.
For one of my stronger tests, I used roughly:
1344 × 768
The source frame showed a woman inside a dark library.
Instead of writing only a short motion prompt, I built a more structured prompt that describes:
- The opening composition
- Character identity
- The story goal
- Actions
- Dialogue
- Camera movement
- Environmental sounds
- Background music
This gives the model more information about what should remain stable and what should change.
A better way to write MiniMax H3 prompts
The official MiniMax H3 prompting guide recommends describing the scene, actions, camera movement, dialogue, sound effects, and music as part of a coherent audiovisual timeline.
That matches what worked in my tests.
For image-to-video, I begin by anchoring the first frame.
For example:
Use the supplied first frame as the exact opening composition.
I then describe the visual details that should remain stable.
For example:
Continue naturally from it. Preserve the woman’s facial identity, dark wavy hair, small gold earrings, clothing, and all important visual details.
The exact wording is less important than the job of the instruction.
You are telling the model which details should not drift during the generation.
Define the scene goal
I then define what the scene is trying to accomplish.
In my library example, an unseen person challenges the woman while she protects a book.
That gives the movement a reason.
Instead of telling the model to create random movement, I can describe a simple chain:
- She hears something.
- She protects the book.
- She confronts the unseen person.
The story is small, but the actions are connected.
That makes the prompt easier to control.
Use clear speaker IDs
MiniMax’s official prompt format supports stable speaker IDs such as S1 and S2.
In my example:
- S1 is the woman
- S2 is an unseen voice
S1 says:
“If you came for the book, tell me who sent you.”
S2 answers:
“Your father.”
After S1 finishes speaking, I add an instruction that her lips stop moving.
For example:
Her lips stop moving immediately after the last word. She listens in silence and keeps the book pressed firmly against her body.
This kind of instruction is useful when the model continues moving the character’s mouth after a line has ended.
The official prompt guide also recommends keeping stable speaker IDs across shots and clearly separating spoken dialogue from other scene information.
Describe the reaction instead of adding more dialogue
After the unseen voice says “Your father,” the woman does not need another line.
Her reaction can carry the scene.
She looks down, touches the cover, closes the book, and holds it against her body.
This is a useful prompting principle for AI video.
Do not force every emotion into dialogue.
Visible actions are often easier for the viewer to understand.
Add camera and sound instructions
After the main action, I describe the camera.
Then I define the soundscape.
For the library scene, I wanted:
- A quiet old room
- The woman’s breathing
- The sound of the book closing
- No additional voices
- No unnecessary loud impact sounds
I also used restrained background music built around a low suspenseful tone.
MiniMax’s official prompt guide separates the main multimodal description, the overall soundscape, and non-diegetic music.
That structure is useful because it keeps different types of instructions organized without breaking the scene into unrelated keyword lists.
What happened in my library test
The woman opened the book and asked:
“Who sent you?”
The unseen speaker answered:
“Your father.”
She then closed the book.
What interested me was the object interaction.
I intentionally started with a difficult reference image. The book was already partly closed and held in a position that required the model to create additional hand movement.
The result was not perfect, but the hand movement and book interaction were surprisingly close.
The character, object, and overall scene also remained consistent.
This is one of the areas where MiniMax H3 performed well in my testing.
Use time segments for longer actions
You can also describe what should happen during different parts of the video.
I tested this with a fifteen-second train scene.
The basic action was:
- The woman waits at a station.
- A train arrives.
- She says, “This time, I am getting on.”
- She walks toward the train.
- She enters it.
The movement and lip synchronization worked well in my result.
However, one problem appeared.
The generated train no longer matched my reference train closely enough.
Instead of rewriting the entire prompt, I added a stronger preservation instruction.
I told the model to preserve exactly the same woman and the same train from the reference image.
That leads to a useful rule for MiniMax H3 prompting:
If one element changes incorrectly, tell the model exactly which element must remain unchanged.
Do not keep adding vague quality words.
Name the object, character, clothing, environment, or composition that needs correction.
Turbo LoRA: useful, but my four-step result was poor
I also tested a community Turbo LoRA for MiniMax H3.
The file used in my workflow was:
minimax_h3_turbo_4step_ckpt500_pruned_comfyui.safetensors
The LoRA is designed around very low-step generation.
I connected it after the diffusion model loader.
The important result from my test was that four steps did not work well for me.
The output quality was poor.
When I increased the generation to around 8 to 10 steps, I got a better result.
There was still some texture degradation, but the result became much more usable.
Because of this, I would not assume that “4-step LoRA” means four steps will always give the best production result.
Test several values on your own setup.
I also tested the Turbo LoRA with an INT8 compressed FL2VA model at four steps. That combination produced a very poor result for me.
For my normal production workflow, I currently leave the Turbo LoRA disabled and use the regular FL2VA setup.
Treat the Turbo LoRA as an optional third-party optimization, not a required MiniMax H3 component.
First-frame plus last-frame generation
MiniMax H3 can also generate a video between an exact opening image and an exact ending image.
Connect:
- Your starting image to
first_frame - Your ending image to
last_frame
The official ComfyUI documentation confirms that both inputs are optional and can be used together for first/last-frame generation.
In the prompt, make the role of each image clear.
Tell the model that the first image is the opening frame and the second image is the ending frame.
MiniMax’s own prompt guide recommends describing the continuous path between these keyframes instead of treating them as unrelated pictures.
For my test, I used two characters.
S1 says:
“The road ahead is too quiet.”
S2 answers:
“Then we stay ready.”
The generated result followed the opening frame, ending frame, and both dialogue lines.
Two nodes I do not use in my main workflow
I also tested additional optimization nodes.
Two did not earn a place in my final workflow.
Spectrum Apply MiniMax H3
Some users report speed improvements from Spectrum Apply MiniMax H3.
In my own test, the speed improvement was small, while motion and visual quality became worse.
Because of that trade-off, I do not use it for my final-quality workflow.
That is a first-hand result from my setup, not a claim that the node will behave identically for every user.
MiniMax H3 Sigma Shift
I also leave the additional MiniMax H3 Sigma Shift node out of my main workflow.
The native MiniMax H3 ComfyUI workflow already contains the scheduler and sigma handling required by its normal setup, so I did not gain a useful reason to keep another sigma-related node in the main chain.
Keeping unnecessary nodes out of the production workflow also makes troubleshooting easier.
How I reduced blurry and morphing faces
One user asked why a face became blurry or started morphing at a higher megapixel setting.
I tested the issue manually instead of relying only on the Resolution Selector.
I set:
1344 × 768
The face looked more stable in my result.
This matches the current ComfyUI guidance that places MiniMax H3’s native canvas around a 768-pixel short edge, with roughly 1344 × 768 for 16:9.
Higher numbers do not automatically mean better results.
Increasing the resolution beyond the model’s practical native range can use much more memory while also making the generation harder to control.
For face consistency, I would start with these checks:
- Use a high-quality source image.
- Make sure the eyes and face are already sharp.
- Use a practical native resolution such as 1344 × 768 when your hardware can handle it.
- Add clear identity-preservation instructions.
- Reduce the resolution if you are running out of memory.
- Upscale the completed video afterward if needed.
If the input face is already blurry, the generated result may also lack facial detail.
Upscaling for lower-VRAM users
Instead of forcing MiniMax H3 to generate at a very high resolution, low-VRAM users can generate a smaller video and upscale it afterward.
I tested the RTX Video Super Resolution node.
I used:
- Scale: 2
- Quality: Ultra
The node can upscale images and video and is designed for NVIDIA RTX GPUs.
This gives you another approach:
Generate at a manageable resolution first → upscale the finished result
For many GPUs, this is more practical than trying to push the base MiniMax H3 generation too high.
Ref2VA: use references without making them the first frame
The Ref2VA workflow changes how you can direct the model.
Replace the FL2VA workflow node with:
MiniMax H3 Reference to Video
Then load the Ref2VA diffusion model.
The official workflow uses separate Ref2VA weights because reference-to-video is different from the FL2VA model used by text-to-video and image-to-video.
You can connect reference images directly.
The prompt identifies the connected references as:
<Picture 1><Picture 2><Picture 3>
and so on.
For video, you can use tags such as <Video 1>.
For standalone audio, use tags such as <Audio 1>.
The connection order matters because the tags correspond to the order of the inputs.
Using one reference image for character identity
For my first Ref2VA test, I used one image of a woman.
My prompt told the model to preserve the woman from <Picture 1>, including her:
- Face
- Hair
- Clothing
- Accessories
I then asked her to walk through a luxury beach resort at sunset.
The original reference image did not show her complete lower body.
The generated video created the missing body area while keeping the character reasonably close to the reference.
This is different from first-frame image-to-video.
The reference image gives the model identity information without forcing the exact image to become frame one.
ref_image_size: match compared with max
Ref2VA has a useful ref_image_size setting.
The current official documentation provides two important choices:
match
The reference is scaled toward the generation resolution. This is faster and uses less memory.
max
The model keeps more reference-image detail, up to a 2048-pixel short edge according to the current ComfyUI guide. This can improve reference fidelity but uses more time and memory.
If you get an out-of-memory error, start with match.
Use max when reference fidelity matters more and your hardware has enough memory.
Use one image for the character and another for the environment
My next test used two references.
<Picture 1> was the woman’s character sheet.
<Picture 2> was the environment.
I told the model that Picture 1 controlled the woman and Picture 2 controlled the setting and mood.
Then I kept the action simple.
The woman walked through the scene.
The final result remained reasonably consistent in:
- Face
- Clothing
- Sandals
- Environment
This is one of the best ways to use multiple references.
Give each reference one clear responsibility.
The official ComfyUI guide makes the same recommendation: explicitly tell the model whether each reference controls identity, style, motion, camera movement, voice, or another part of the shot.
Add a third reference for a product or prop
I then added a handbag as <Picture 3>.
The prompt now had three different jobs:
<Picture 1>→ woman<Picture 2>→ environment<Picture 3>→ handbag
The handbag stayed close to the reference, including its visible design and sides.
This is much clearer than uploading three images and asking the model to “use all references.”
Tell MiniMax H3 why each image exists.
Multiple character references for action scenes
I also tested a fighting scene requested by a viewer.
I used:
<Picture 1>for a female character sheet<Picture 2>for a male character sheet<Picture 3>for the background
The result kept both characters and the environment reasonably close to their references while generating the fight movement.
For action scenes, character sheets with several useful angles can help because the model has more information about how each person should look from different viewpoints.
The native Ref2VA workflow currently supports up to nine image references, so you have room to separate character, costume, prop, and environmental references when needed.
Do not add references only because the maximum is nine.
Every extra reference should have a clear purpose.
Copy motion from a reference video
This is one of my favourite Ref2VA features.
You can use a video mainly as a motion reference while taking the character identity from an image.
For my dance test, I used:
- A woman’s image
- A dance video
I told MiniMax H3 to preserve the woman from the image while using the choreography, poses, and movement from <Video 1>.
The result replaced the original person with my reference character while keeping the motion and much of the video environment.
I ran another version with separate references for:
- The woman
- The background
- The movement video
This allowed the generated video to use my chosen character and location while taking the dance movement from the video.
The official Ref2VA documentation confirms that reference videos can be assigned to motion or camera movement rather than being treated as the final visual identity.
Replace the reference-video audio
The reference video does not have to control the final audio.
You can supply separate audio.
In my workflow:
- Load the new audio with
Load Audio. - Keep the reference-video frames connected.
- Disconnect the original paired video audio if you do not want it.
- Connect your separate audio to the standalone reference-audio input.
- Tell the prompt how that audio should be used.
The video can then control movement while the separate audio controls the soundtrack or timing.
In one test, the audio I generated was not very good, but the purpose of the experiment was to confirm how the standalone audio connection worked.
The current official Ref2VA workflow supports standalone audio references in addition to reference-video audio.
My recommended MiniMax H3 starting setup
If you are building your first practical workflow, I would not enable every optimization at once.
Start with a stable baseline.
For FL2VA
Use:
- Updated ComfyUI
- Native MiniMax H3 FL2VA model
- Correct text encoder
- Video VAE
- Audio VAE
- 0.4 megapixels for initial tests
- 16:9 at about 864 × 480 for previews
- Around 1344 × 768 when you want higher quality and have enough VRAM
- 20 steps while establishing a baseline
- Clear prompt with visual, motion, dialogue, camera, and sound instructions
Then optimize.
Add:
- Patch Sage Attention KJ
- Test 15 steps
- Test EasyCache
- Compare output quality after every change
Do not add three performance nodes at once and then try to guess which one caused a problem.
For Ref2VA
Start with:
- One character image
ref_image_size: match- One simple action
- One clearly assigned reference job
Then add:
- Environment reference
- Prop reference
- Second character
- Reference video
- Separate audio
This incremental approach makes failures much easier to diagnose.
Quick troubleshooting table
| Problem | What I would test first |
| Out-of-memory error | Lower resolution or use ref_image_size: match |
| Face becomes blurry | Use a sharper source image and test around 1344 × 768 |
| Identity changes | Add a direct identity-preservation instruction |
| Object changes | Name the exact object that must remain unchanged |
| Reference train or background changes | Assign the reference a specific role in the prompt |
| Generation is too slow | Test local SageAttention, then fewer steps, then EasyCache |
| SageAttention gives an error | Bypass it and confirm the base workflow works |
| Global SageAttention changes output | Test the local Patch Sage Attention KJ node |
| EasyCache changes the image | Disable EasyCache and compare |
| Turbo LoRA looks bad at four steps | Test 8–10 steps or disable the LoRA |
| High-resolution output looks worse | Return closer to H3’s practical native resolution |
| Low-resolution result needs more detail | Upscale after generation with RTX Video Super Resolution |
What worked best in my testing
After testing the different workflows, these are the parts I found most useful.
For speed, Patch Sage Attention KJ + 15 steps + EasyCache gave me the largest practical improvement.
For image-to-video, clear identity and object-preservation instructions helped control consistency.
For character work, Ref2VA gave me much more flexibility than treating every reference as an exact opening frame.
For multiple references, the most important technique was assigning every image or video a clear job.
For motion transfer, a reference video can control choreography while separate images control the character and environment.
And for low-VRAM systems, generating at a sensible resolution and upscaling afterward can be more practical than forcing very large native generations.
The official Comfy-Org repository contains the native FL2VA, Ref2VA, text-encoder, video-VAE, and audio-VAE files used by the current ComfyUI workflows. ComfyUI’s current MiniMax H3 documentation also covers resolution, reference limits, prompt structure, and Sage Attention setup.
Generation time and VRAM use can vary widely between GPUs and workflow configurations. My timing numbers in this guide describe my own tests and should be treated as practical reference points rather than guaranteed performance.
For my current production workflow, I would start with the normal FL2VA model, use the local SageAttention node, test EasyCache separately, keep TorchCompile optional, and leave Turbo LoRA disabled until I have compared it carefully with the normal workflow.

