
Are your local AI image edits changing your character’s face, shifting the background, or cropping your vertical images incorrectly? You are not alone. While local image editing is incredibly powerful, traditional inpainting models struggle to keep faces consistent or maintain the original composition.
I tested the new JoyAI Image Edit suite natively in ComfyUI, and it is a massive breakthrough. In this step-by-step tutorial, I will show you how to build the complete workflow, run INT8 models on low-VRAM GPUs, and use a “Resize and Pad” trick to completely stop image cropping.
What is JoyAI Image Edit and Why It Protects Your Scenes
Direct Answer: JoyAI Image Edit is a powerful local image-to-image editing tool for ComfyUI. Unlike older models that warp backgrounds or change facial structures, JoyAI is designed to swap clothing, move objects, and rotate camera angles while keeping your character’s face and background completely consistent.
Simplest Step-by-Step Action: Update your ComfyUI, download the INT8 compressed models, and apply a Resize and Pad node to edit vertical images without any cropping.
If you try to edit specific parts of an image using standard inpainting, the full scene often drifts. This leaves you with mismatched backgrounds and altered faces. JoyAI solves this by keeping the important details static and modifying only your requested areas.
Step 1: Downloading the Best Models for Low VRAM
To set up this workflow, you must download the correct model files first. Using compressed versions is designed to help prevent out-of-memory crashes on consumer graphics cards.
Load the INT8 Compressed Weights
If your computer has limited video memory, download the INT8 compressed version of the JoyAI Image Edit model. I tested this model and found it is actually faster than the standard FP8 version.
Because there is no official smaller LoRA available, you must download this full checkpoint file to your models/checkpoints folder.
Configure the Qwen3-VL 8B Text Encoder and VAE
Next, you need a specialized text encoder. Download the Qwen3-VL 8B INT8 compressed text encoder to save system memory.
Save this file in your models/clip folder. Finally, download the old Wan 2.1 VAE model file and place it in your models/vae folder.
Step 2: Wiring the Single-Image Editing Workflow
Direct Answer: To edit a single image, you must connect a Load Image node into the specialized TextEncodeJoyImageEdit node in ComfyUI.
Simplest Step-by-Step Action: Open your ComfyUI Manager, click update, and restart. Search your search menu for TextEncodeJoyImageEdit and add it to your workspace.
Connect your positive and negative prompts directly to this node. The single-image node is built specifically to process one starting image.
Here is an important technical limit: the longest side of your input image must never be more than 1024 pixels. If you upload a massive image, the model will stretch, crop, or distort the final result.
Step 3: Solving the Cropping Problem with Resize and Pad
Direct Answer: You can stop JoyAI from cropping the top or bottom of your vertical images by using a Resize and Pad node to place the image on a square canvas.
Simplest Step-by-Step Action: Resize the longer side of your image to 1024 pixels, pass it through Resize and Pad to create a 1024×1024 square, and crop out the white padding after generation.
When you send a vertical image, like a 768×1024 photo, directly into the JoyAI node, the final image often looks zoomed-in or cropped. To fix this, the Resize and Pad node adds temporary white padding to the left and right sides of your photo.
This creates a perfect 1024×1024 square canvas. Send this padded image into JoyAI. After generation, simply crop out the white padding on the sides to return your image to its original vertical shape.
Step 4: Advanced Features: Camera Controls and Moving Objects
Direct Answer: JoyAI understands 3D spatial dimensions, allowing you to rotate camera angles and move specific objects using red boxes.
Simplest Step-by-Step Action: Use precise terms like “yaw” and “pitch” to rotate the viewpoint, or place a red box on your image to guide object placement.
Unlike older models that generate completely random angles, JoyAI moves the camera viewpoint while keeping the scene static. Yaw controls your horizontal camera rotation, and pitch controls your vertical camera rotation.
You can also move elements easily. For example, draw a red box in the sky and type:
“Move the moon into the red box.”
The model will move the subject exactly into the marked area without shifting any other details.
Step 5: The Wan 2.1 VAE Trick to Upgrade Edits
Direct Answer: You can significantly improve the sharpness and fine details of your edits by replacing your standard VAE node with the Wan 2.1 Upscaler VAE.
Simplest Step-by-Step Action: Add a VAE Utilities node in ComfyUI, load the Wan 2.1 Upscaler VAE, and decode your final latent images through it.
Standard VAE decoders can sometimes compress edited pixels, leaving a blurry seam around the modified area. Bypassing your standard VAE and using the Wan 2.1 Upscaler VAE fixes this issue completely.
It upscales the image during the decoding stage, yielding incredibly crisp skin and sharp textures.
Step 6: Multi-Image Editing with JoyAI Image Edit Plus
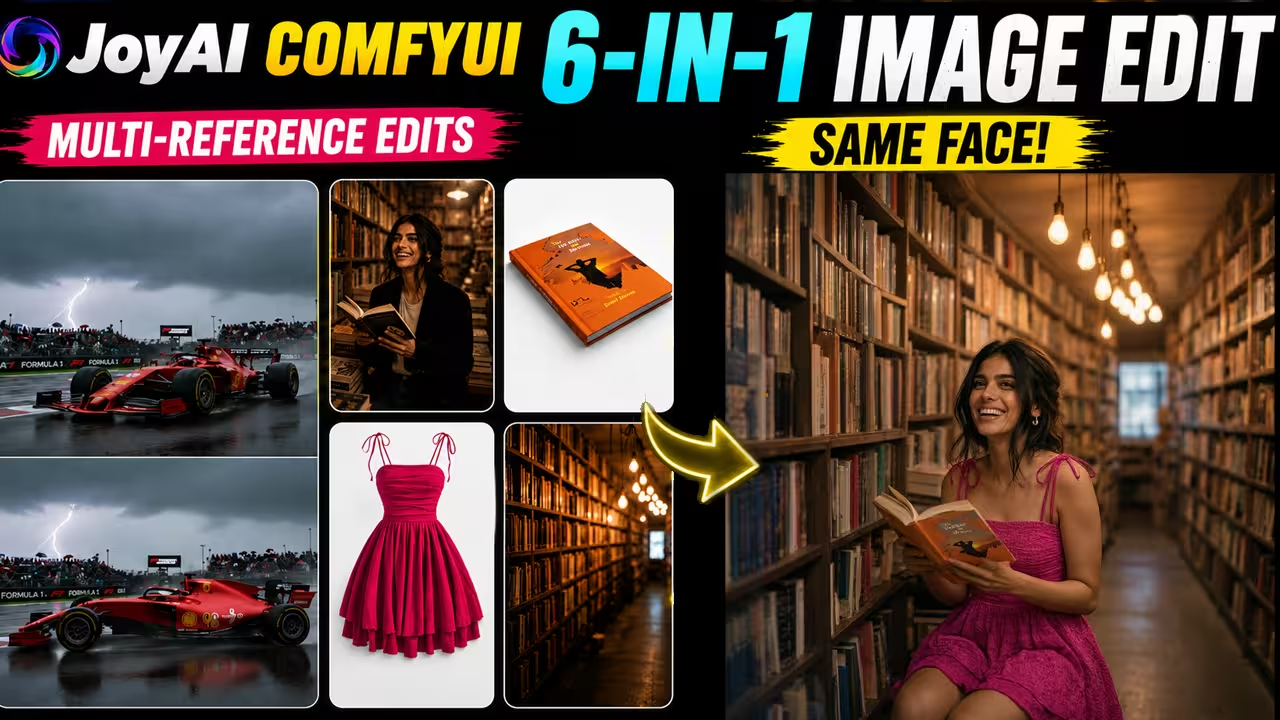
Direct Answer: JoyAI Image Edit Plus allows you to combine up to four different reference images to swap characters, transfer clothes, or mix environments.
Simplest Step-by-Step Action: Select the JoyAI Image Edit Plus model and the matching Edit Plus Qwen-VL text encoder. Do not mix the single-image model with the Plus text encoder, or the system will crash.
Combine Multiple Reference Images Safely
To swap a character or transfer clothes, load your reference images into ComfyUI. In your text prompt, you must explicitly describe the role of each image.
Use this prompt formula:
“Use Image 1 as the main woman and pose reference. Use Image 2 as the clothing reference. Use Image 3 as the book reference.”
Natural Background Outpainting
You can also use this model to outpaint. When you use the Resize and Pad node on a vertical image, you do not have to crop out the white side padding.
Instead, tell the model to fill those spaces. JoyAI will naturally extend your background into the empty areas to complete the scene.

