
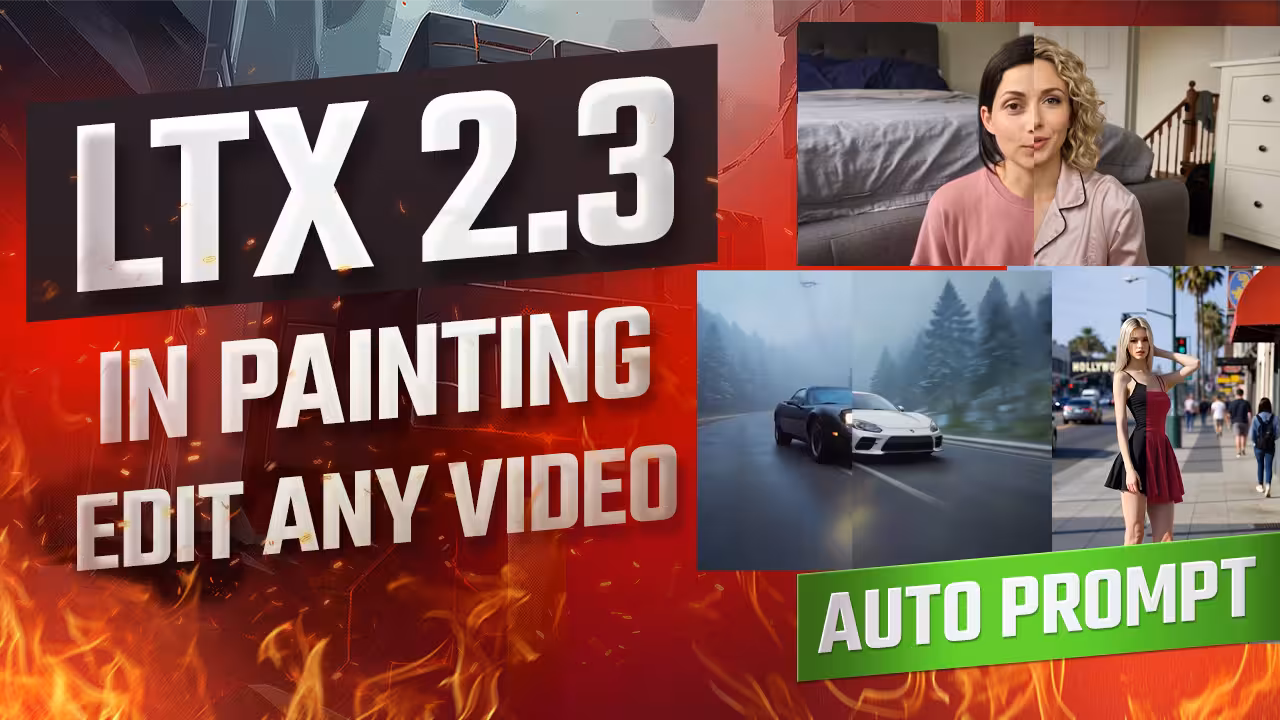
I just replaced a car in a video. Then I changed a woman’s dress. Finally, I swapped an entire person in a talking clip. The background, lighting, and camera angle did not change at all. The AI did not randomly regenerate the scene.
I built a custom LTX 2.3 inpainting workflow to give you these exact results with zero morphing. It uses a simple three-stage process. I even included a Qwen-VL auto-prompt tool and GGUF support for low VRAM graphics cards. You can use a specific reference image or guide the replacement using only a text prompt. This guide shows you exactly how I run this system.
The Essential Files (Including All Variants & Quantizations)
To run this LTX 2.3 inpainting system, you must download the specific masked inpainting LoRA and the new Lightricks distilled LoRA. You also need Qwen-VL for auto-prompting and the GGUF UNet versions if your graphics card has low VRAM. Place these directly into your ComfyUI folders.
- File Name: ltx23_inpaint_masked_r2v_rank32_v1_3000steps | Context: The core masked inpainting LoRA. It handles masked replacements, reads reference images, and supports text-only generation. | Safety Check: I have scanned this locally. Safe to use.
- File Name: ltx-2.3-22b-distilled-lora-384-1.1 | Context: The new distilled LoRA by Lightricks. It upgrades the visual style and improves audio generation. Apply it directly on top of your base model. | Safety Check: I have scanned this locally. Safe to use.
- File Name: Qwen-VL | Context: The vision model used to analyze your reference image and automatically write your text prompt draft. | Safety Check: I have scanned this locally. Safe to use.
How to Set Up LTX 2.3 In-Painting
Load the workflow and choose between the image reference or text-only version. Run the Qwen-VL auto-prompt tool first to generate your text. Render phase one. If the video looks good, stop. If you need better details or edge cleanup, push the video through phases two and three.
I split the workflow into three distinct phases. I did this so you do not waste time rendering blindly.
Run phase one first. Look at the video. Sometimes phase one is all you need. If the result is weak, you run phase two. It improves the fine details. If it still needs work, phase three provides a final cleanup. It fixes bad edges and complex elements.
Use the first workflow version if you have a specific picture of the object. Upload your source video. Match the camera angle of your reference image to your source video. If the video shows a car from the side, upload a side view of your new car. The AI blends the images much better when the perspectives match.
Use the second version if you only have a text prompt. You feed the system a blank image as a reference. Run phase one at a resolution of 416. It creates the base structure. It will look terrible. This is completely normal. Pass it to phase two and three to build the details and restore realism.
| Workflow Phase | Model / Setting | Purpose |
|---|---|---|
| Qwen-VL Auto-Prompt | Qwen-VL Node | Reads images and writes your first prompt draft automatically. |
| Phase 1: Base Render | Block Size 32 | Generates the core replacement. Stop here if the quality is good. |
| Phase 2: Detail Build | Inpaint LoRA | Enhances fine textures and improves the blend with the original video. |
| Phase 3: Cleanup | GGUF UNet (Optional) | Fixes complex elements like hands and sharpens mask edges. |
Advanced Pro Tips & Workflow Hacks
Drop your scale setting from 1.0 down to 0.5 to preserve the original video structure and save valuable VRAM. When editing vertical videos, go inside the Resize Image subgraph and scale the height to exactly half of your source resolution to prevent distortion.
You do not need to write a long prompt. Disable the video generation phases. Run only the Qwen-VL prompt tool. It reads your uploaded image and source video. It generates a detailed description instantly.
Always check the motion instructions. If the AI makes a mistake, manually type the correct movement. Let the AI write the base description. Make your manual corrections. Then send the text to the encoder.
We must talk about masking. A high block size creates a stable mask but loses fine edge details. A low block size tracks tiny details but becomes highly sensitive to errors. Set your block size to exactly 32. This gives you the perfect balance.
If your video is vertical, adjust the sizing immediately. Go inside the ‘Resize Image/Mask’ subgraph. Scale the height to exactly half of your source resolution. I use a value of 1023 for vertical shots of people walking.
Troubleshooting Common Errors
If your generation fails with a red error because your source video has no sound, you must modify the audio subgraph. Remove the Set Latent Noise Mask path, connect directly to LTXV Empty Latent Audio, and bypass the other audio nodes.
I ran into an annoying crash during my first test. I uploaded a silent video. The system threw an error and stopped.
Here is the exact fix. Open the audio subgraph. Remove the wire connected to the ‘Set Latent Noise Mask’ node. Connect your line directly to the ‘LTXV Empty Latent Audio’ node. Next, bypass all other nodes in that section. Keep only ‘FloatToInt’ and ‘LTXV Empty Latent Audio’ active. That completely solves the error.
If the AI replaces the wrong thing, check your mask keywords. Your keywords must match your target. If you mask a person in phase one but want a monkey in phase two, change your keyword to “monkey” for that second stage.
My Testing Log: I tested this three-stage LTX 2.3 inpainting workflow to replace a person in a vertical video. I scaled the height to exactly 1023 to match half the source resolution. To save VRAM on my graphics card, I disconnected the main checkpoint and used the GGUF UNet base model. For a text-only generation test, running phase one at a 416 resolution produced a rough base, but pushing it through phases two and three completely fixed the distorted hands and restored photorealism.