
Generating accurate masks in ComfyUI used to fail frequently. We relied on outdated custom nodes like SAM3 Segment RMBZ, and the software crashed constantly. We don’t have to do that anymore. SAM 3.1 now runs natively right inside ComfyUI. The process is fast, and your masks remain perfectly stable.
I use this exact workflow to mask simple still images and track fast-moving video objects. I’ll show you how to configure your settings and use a precise coordinate trick to guarantee flawless results every single time.
The Native Setup and Text Prompting
You must delete your old custom masking nodes first. Search for the new native node called SAM3 Detect.
Use this reference table to configure your basic setup:
| ComfyUI Node | Exact Connection & Action |
|---|---|
| Load Checkpoint | Connect this to your model input. Select the SAM 3.1 Multiplex FP16 model file (1.75 GB). Keep this file in your checkpoint models folder. |
| CLIP Text Encoder | Connect this to the condition node and the checkpoint CLIP hook. |
| Preview Mask | Wire your mask hook from SAM3 Detect directly into this node. |
Type a simple prompt like “boxer” and run the software. SAM3 selects your subject based purely on your text. You can select multiple items at once. Just separate your objects with commas, like “lamp, shoes, T-shirt, bag.”
My Exact Photoshop Coordinate Trick
Text prompts work well, but the AI sometimes selects the wrong object. We fix this completely using positive coordinates. You open a string node, connect it to your positive coordinates, and tell SAM3 exactly where to look using specific X and Y pixel values.
I use Photoshop to find these exact numbers. Follow these quick steps:
- Open your image inside Photoshop.
- Click Edit, then Preferences, then Units and Rulers.
- Set your ruler unit strictly to pixels.
- Open your Info panel from the Window menu.
- Hover your cursor directly over the object you want to mask. The Info panel displays your precise X and Y numbers.
Take those numbers and type them into your positive coordinates box. Use this exact format: 2128, 734. Run the prompt. SAM3 grabs that specific object perfectly. You don’t even need to type a word. You can select multiple points by pasting another coordinate value and separating them with a comma and a space.
Using “Mask Subtract” for Failed Negative Coordinates
You can use this exact coordinate trick with a negative input to force the AI to remove an object, like a pair of boxing gloves. However, negative coordinates frequently fail to work.
When the software fails, I use the Mask Subtract node as a safe workaround. This node uses two inputs: Mask A (your main mask) and Mask B (the mask you want to remove).
You simply create a second mask setup. Type “gloves” into your prompt to isolate them. Connect that second mask directly to Mask B. SAM3 detects the gloves flawlessly and removes them from your main mask. This gives you absolute control over your scene when negative coordinates fail.
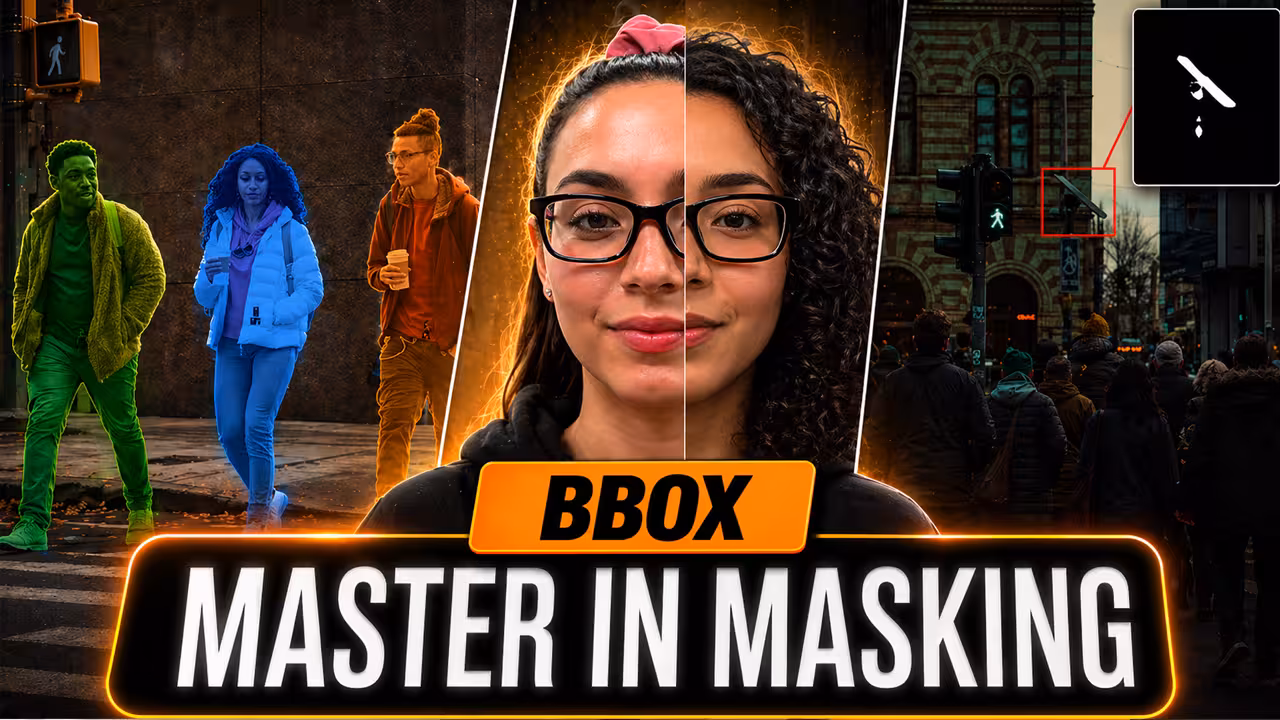
Precision Isolation with Bounding Boxes
Sometimes your image contains multiple people, and you only want to select one specific target. A simple text prompt like “person” forces the AI to guess, and it usually grabs the subject right in the middle.
We fix this using the Bounding Box node. I add this node and wire it straight into the bbox input on SAM3 Detect. You bypass your CLIP text encoder entirely because we don’t need text prompts for this method. I find the exact X and Y coordinates for my target area using Photoshop. You plug those exact numbers, like X: 341 and Y: 989, directly into your bounding box settings. Run the prompt. This forces the software to select your exact object. I use this constantly for difficult masks.
The Ultimate Settings for Clean Edges
You must configure your exact settings before you start rendering. I use this specific setup for my own masks:
- Threshold: Keep this value strictly at 0.5. My tests show that changing this from 0.1 to 0.7 makes no real difference. 0.5 is the most reliable setting.
- Refine Iteration: Increase this setting to 3 or 4. If you leave the value at 0, your mask looks rough. Letting SAM3 check and refine the mask three or four times generates a much higher quality edge.
Flawless Video Tracking
We need different nodes to track moving footage. Delete SAM3 Detect. Load the SAM3 Video Track node and the SAM3 Track to Mask node. Connect your model, your text encoder, and your video using the Get Video Component node.
You must configure two critical settings when tracking video. Use this reference table for your setup:
| ComfyUI Setting | How We Use It |
|---|---|
| Detect Interval | The default value is 1. This works for slow footage but misses parts of fast-moving objects, like a blazing fire. Increase this to 5 for fast subjects. You get a much tighter, highly accurate mask. |
| Maximum Object | At 0, the software selects everything matching your prompt. Change it to 1 to isolate a single subject. If you need exactly three distinct objects, set it to 3. The system isolates all three and perfectly numbers them in your output. |
Remove your old custom nodes and plug your media into this native SAM 3.1 setup. This guarantees a clean, stable masking workflow that functions flawlessly every single time.