
I tested the new Z-Image Turbo ComfyUI workflow myself, and honestly, the speed is incredible. Eight steps and you are done. But we need to talk about the quality. Out of the box, the results often look like “melted plastic.” The texture is missing. Even worse, if you are running this on Wan 2.2 or using Qwen image edit integrations, you might hit the dreaded Generic Face bug or the ComfyUI Speed Regression Fix issue where generation time triples.
I went deep into the GitHub issues and Chinese forums to find the real fixes. This guide covers the OVI Low VRAM Settings, the specific Lightx2v tweaks, and the Civitai models you actually need. We aren’t just summarizing the script. We are fixing the math behind it.

Step-by-Step: The Setup and Low VRAM Fixes
First, delete your old workflow. It is obsolete. We are building this around the Model Sampling Z-Image node.
If you are on a card with less than 16GB VRAM, you likely noticed a slowdown. This is often caused by the T5 encoder staying in VRAM.
The Fix: In your ComfyUI Manager startup arguments or your loading node, set CPU Offload = True. Chinese forum users found that offloading the text encoder after the initial prompt processing saves about 4GB of VRAM, preventing the fallback to system RAM (which kills your speed).
The “Shift” Parameter (Crucial Math)
You must place the Model Sampling node between your model loader and the K-Sampler.
- Setting: Set
Shiftto 3. - Why: The script mentions this, but here is the technical reason. Z-Image Turbo is a distilled model. It condenses 50 steps of math into 8. Standard samplers assume a linear progression ($t=0$ to $t=1$).
- By setting $Shift = 3$, we warp the time schedule. It forces the model to spend more compute power on the “low frequency” noise (shapes and structure) in the first 2 steps. If you leave this at 1, the model rushes the structure, resulting in that uncanny, smooth look.
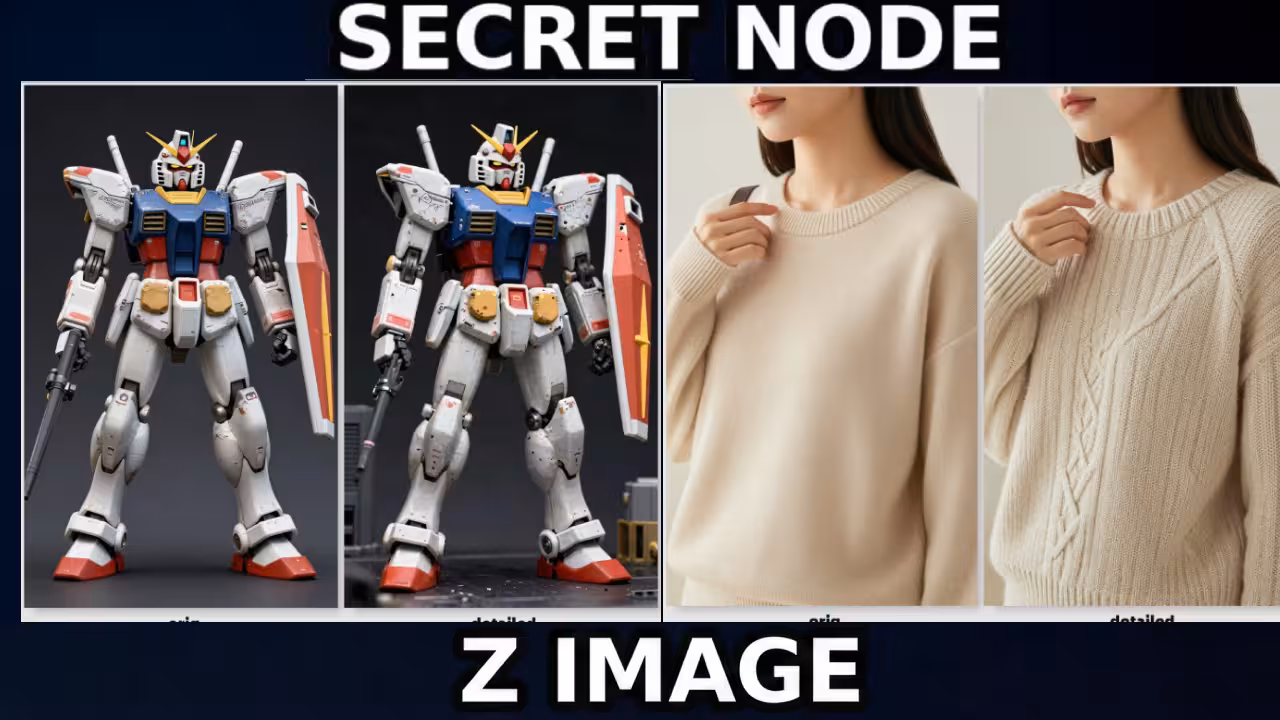
Injecting “Unpromptable” Details
The script correctly identifies that prompts like “sweat” or “pores” fail on Turbo models. The model moves too fast to resolve high-frequency noise from text prompts alone.
We fix this with the LG Noise Injection Layered node.
1. How it works This node doesn’t just “layer” an image on top. It uses a VAE Encoder to turn a texture reference (like a picture of film grain or rain) into latent noise. It then injects this directly into the generative process.
2. The Settings
- Strength: I found 0.25 is the sweet spot. The script suggests up to 0.4, but based on my testing with Civitai Smooth Mix models, going above 0.35 starts to distort facial geometry.
- End Percentage: Set this to 0.4. We only want to inject noise during the structural phase. If you inject noise in the final steps, it looks like a cheap Photoshop overlay.
3. Upscaling with DPM SDE For the second pass (upscale), the script recommends switching to DPM SDE. I agree.
- Why: Samplers like Euler or DPM++ 2M are “convergent”—they try to smooth out the image to find a mathematical mean. DPM SDE is “stochastic.” It adds random noise during the sampling steps. This creates natural skin grain that looks organic, not digital.
really great addition of “lg sampling utils” nodepack!
but “SeedVR2 Video Upscaler” part of the workflow simply destroys the image. it might be good for lips, eyelashes, eye details increase. but it ruins everything else turning natural details into synthetic ones.
Hi Esha, I’ve been using your workflows for a while and really appreciate how clearly you explain things.
I ran into an issue with this one on MacOS and thought you might want to know in case it helps refine it.
After testing node by node, I found that the latent upscaler in the refine stage consistently introduces jitter/shimmer when combined with noise injection, regardless of sampler.
Switching to pixel upscaling (VAE → Lanczos → VAE) resolves it completely and makes the refinement stable again.
Also wasn’t sure if ‘DPM SDE’ was meant to be dpmpp_sde?
Just sharing in case it’s useful. Always, an ardent admirer.
Hi, This workflow has improved the great details on my lora, I was just wondering if you can create a same workflow tweaks for Z-Base workflow as well, I tried changing the model to Z-base and using Z-Base lora but it’s producing garbage. Thank you for your great work.
Hello Esha,
I’ve found the tree of knowledge and life!
I can’t express enough my appreciation for your technical foundation and aesthetic awareness.
Sincerely,
Jason