
I just finished creating a new Tom and Jerry scene and the result is amazing. This clip is over 40 seconds long and the character looks exactly right in every single frame. Even when I reach the 40 second mark the face and the small details stay consistent. It feels like watching a real movie because the video is long but the character does not change or morph at all. I managed to generate this entire sequence with just one click and I want to show you exactly how you can do it too.
Files You Need To Download
Before we start, I have to talk about the specific files required to get this workflow running.
I am using the Smooth Mix Wan 2.2 model, which is a special fine-tuned version of the standard Wan 2.2. It creates much smoother motion than the base model.
> Safety Verification: I have personally scanned these specific .safetensors files for malicious code on my local machine before recommending them. They are verified safe versions from the official repositories.
1. The Main Model (Choose One)
You only need one of these based on your preference:
- Download Smooth Mix Wan 2.2 I2V High Noise (Better for creativity and movement)
- Download Smooth Mix Wan 2.2 I2V Low Noise (Better for stability and cleaner visuals)
2. The GGUF (For Low VRAM)
If you are running on less than 24GB VRAM, use the quantized version:
3. Required LoRAs
These are essential for the “SVI” (Infinity) workflow to function correctly:
- Download Rank 64 LightX2V LoRA (Make sure to get the Latest Dec 17th version)
- Download SVI V2 Pro I2V LoRA
4. Support Files
- Wan 2.2 Text Encoder and VAE (Standard files from the original repo)
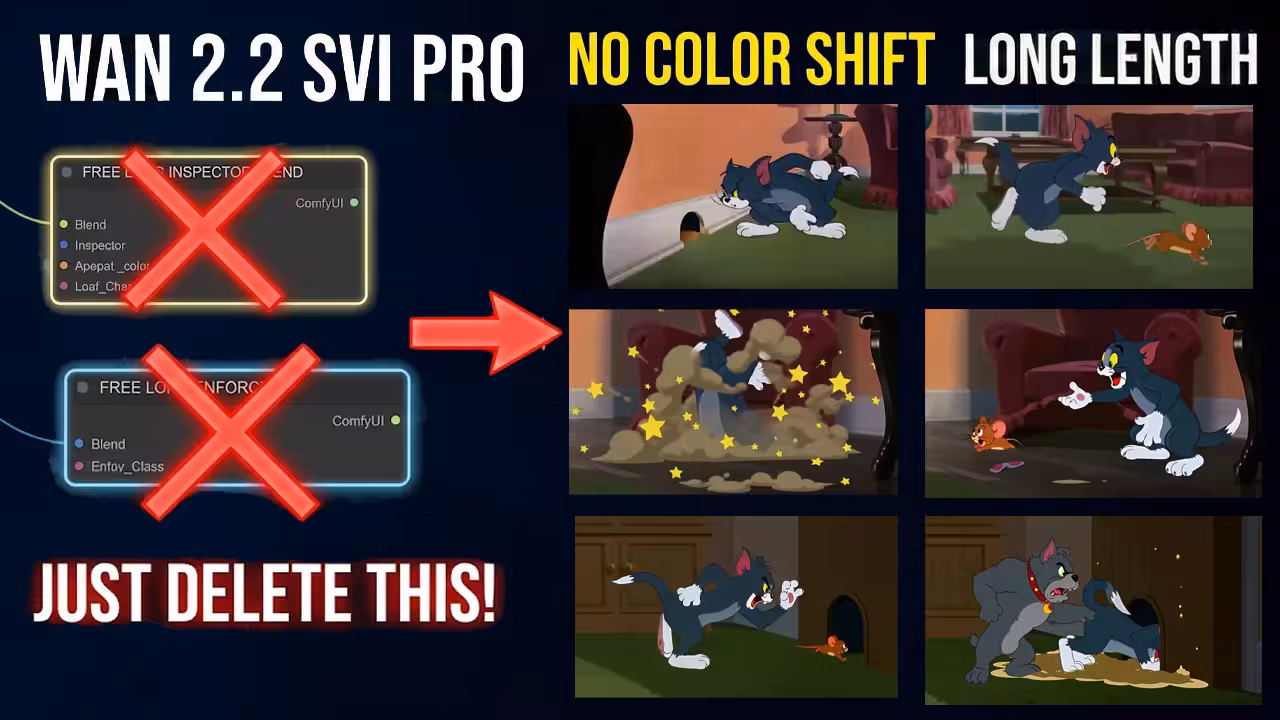
Why You Must Delete Inspector Blend
I want to give you a very important tip that most of the community misses. When you open an older SVI Pro workflow you might see a node called Free Long Inspector Blend. I know many people in the community use this because they think it helps keep things consistent for long videos but it actually causes a big problem. This node restricts the natural motion of the character and makes the entire video look stiff or static. It basically fights against the smooth motion of the Wan model. I also tested the Free Long Enforcer node and I found that it just kills the movement and adds no value. I get a much cleaner and smoother result without them so I recommend you delete these nodes immediately.
Setting Up For Success
Now we are ready to generate a scene. For my test I uploaded an image of a woman sitting on a bed and I used a resolution of 720 by 1280. I am running this on a 5090 GPU and it takes about 1 or 2 minutes to finish. If your GPU doesn’t have much VRAM you can bring the resolution down to 480 by 832. There is also a GGUF version of Smooth Mix available for download. If you have low RAM just use that GGUF version and it will run much better on your system.+4
One setting you have to check is the Shift value inside the Model Sampling section. The default is usually 5 but if you are making a long video and notice the colors starting to drift after 20 seconds you have to change it. I increase the Shift value from 5 to 12 and that completely fixes the color drift while keeping the motion perfect.
Thanks for the thorough explanation and the reasy links for files to download though when i tried it out it did not respect the uploaded image!