


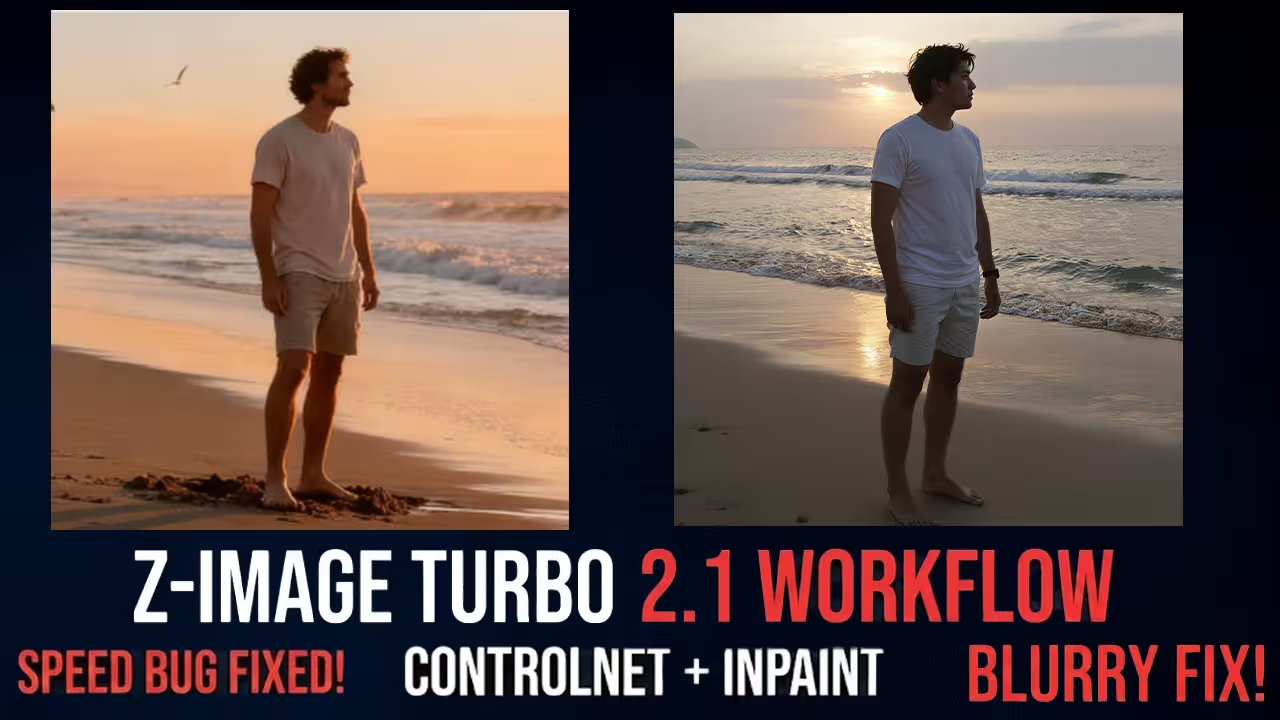
I was waiting for this update for a long time. If you used Version 1, you know how bad it was. The photos were not clear. The details looked weak. It felt like someone put a plastic filter on every image. I saw so many people complaining on Reddit and Hugging Face about this.
Then Version 2.0 came out. It fixed the quality issues. But I found a new problem. It was very slow.
The reason was a bug in the code. A simple spelling mistake made the model do double the work. It ran the control layers twice for every step.
Now the developers released Version 2.1. This version fixes that bug. It is much faster now. It is smoother. And it keeps the high quality we saw in version 2.0.
https://www.youtube.com/watch?v=U4hlna2PCcQ
Why You Have To Switch To Version 2.1
I tested this new file, and the difference is big. Version 2.1 is not just a small update. It changes how you use the model because of the speed fix.
Here is what you get with this new file:
- Faster Speed: The bug is gone so it generates images very quickly.
- Clear Images: The plastic look from Version 1 is fixed.
- Inpainting Support: You can fix faces and change items directly with this ControlNet file.
- One File Only: You just need one file for edges, depth, and pose.
The ControlNet Workflow
I will start with the main workflow. I made this for general image creation.
When you open my workflow, look at the top left. You will see a group called Auto Prompt. I use the Qwen VL node here. I know we get lazy with prompts sometimes.
With this node, you just upload your reference image. Qwen VL looks at it and writes the text for you. It picks up the lighting and the colors automatically.
If you want to write your own prompt, you can do that too. I added a switch there. You just change it to Manual and type your words in the box.
Depth Anything V3 Is Better
Now go down to the ControlNet section. This is where I put the new stuff.
I added Depth Anything V3 directly into this workflow. If you have not used V3 yet, you have to try it. It is much better than V2. It understands hard scenes better.
I tested this with an image from my last tutorial. In that video, Canny and Depth V2 failed to make the background look right. But with Depth V3, the result is exactly the same as the reference. It even saw the person in the background holding a gun. The old models missed that completely.
All In One Node
I also connected the AIO Preprocessor node. AIO means All In One.
This saves you time. You do not have to search for a Canny node or a Pose node every time. You just select what you want from the list. You can switch from SoftEdge to Pose in two seconds.
It connects to the Z-Image Turbo Fun Controlnet Union node. You have to use the new 2.1 file here. This single file does everything.
For Low VRAM Users
I know many of you do not have a 24GB card. So I made a switch in the model loader.
You will see options for GGUF and Safetensors.
If you have a card with 8GB or 12GB of VRAM, you have to use the GGUF loader. I set up a Fast Groups Bypasser node there. You just click it to turn on the version that fits your PC.
The GGUF version runs very smooth on lower specs. And the quality is almost the same.
Inpainting And Differential Diffusion
Now I will show you the second workflow. This is for Inpainting.
Inpainting on Z-Image was hard before. In the old version, you used to get bad lines where the mask ended.
To fix that, I added a node called Differential Diffusion.
You have to use this node. It is very important. It acts like a bridge between your original image and the new pixels. It smooths out the area so the edit looks clean.
Here is what you do:
- Load your image in the Load Image node.
- Right click and open the Mask Editor.
- Paint over the face or object you want to change.
- The workflow sends that mask to the Inpaint Model Conditioning node.
This tells the model to only change those pixels.
I tested this on a cartoon character. I masked the clothes and wrote “a red t-shirt” in the prompt. The model changed the dress to a t-shirt perfectly. The edges were sharp and there was no blur.
My Best Settings
For both workflows, you have to change the settings.
I do not use the normal 20 steps. To get the best speed and quality, I use two samplers.
- Sampler 1 (6 Steps): This does the main work. It makes the structure of the image fast.
- Sampler 2 (3 Steps): This cleans up the noise and adds details.
This is a trick for Turbo models. If you split it like this, 6 steps and then 3 steps, you get a much sharper image. And it is still very fast.
For ControlNet strength, I keep it at 0.80. If you use Depth Anything V3 at 1.0, it is too strong. It makes the image look stiff. At 0.80, the AI can handle the lighting better.
How To Upscale
At the end of the ControlNet workflow, I added an Upscale group.
I use the SeedVR Upscaler. This is good when you want to turn a 1024 image into a 4K wallpaper.
I connected an Image Comparer node at the end. You can slide it to see the difference between the original and the upscaled version. It brings out the skin texture very well.
File You Need To Download
To run this, you need these files. Please check the version numbers.
- Z-Image-Turbo-Fun-Controlnet-Union-2.1.safetensors (Do not use 2.0)
- Depth Anything V3 Model (You need this for the depth map)
- My Workflow JSON Files (I put the links below for both workflows)
You just drag the JSON file into ComfyUI. If you see red nodes, just click Manager and then Install Missing Custom Nodes.
This is a big update for Z-Image Turbo. You should try it and see if the speed fix works for you.
Your workflows are wonderful, it would be great if there was a note indicating which folder to save each file in.
I’m trying to use this one from z-image but I’m getting an error in ksampler saying mat1 and mat2 shapes cannot be multiplied (4056×1028 and 132×3840) and from what I’ve seen it’s related to the model used in Load Clip, I downloaded the same one that’s in the video but the error persists.