


So before we dive too deep into the workflow itself, let me quickly explain what VACE actually is — because if you’re using this model in ComfyUI, it’s good to know what makes it special.
VACE isn’t just another video generation tool. It’s built to handle a bunch of different tasks all in one package. That’s why people are getting such insane results when combining motion, reference images, and prompts.
Here’s what it supports:
That opens up a ton of creative freedom.
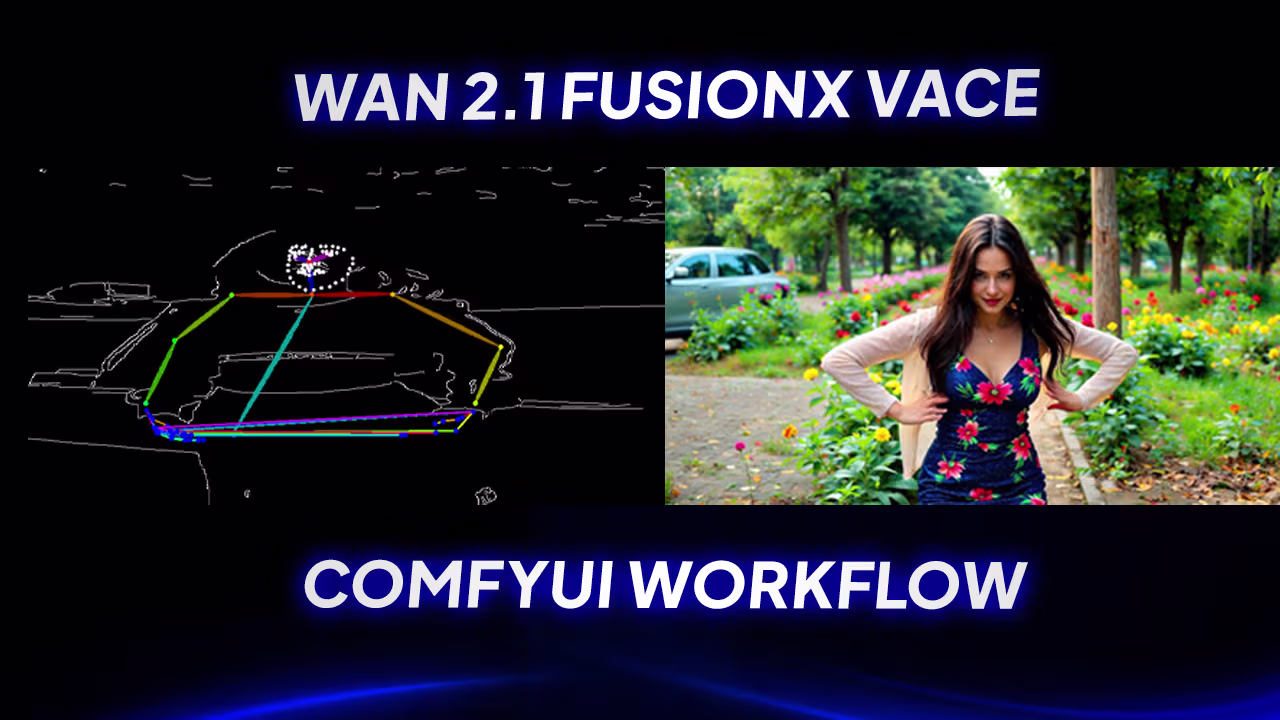
Wan 2.1 FusionX VACE ComfyUI Workflow
Let me tell you — when I tested the Wan 2.1 FusionX VACE ComfyUI workflow with video input, the results were insane .
Like, I’ve tried other image-to-video tools before, but nothing compares to this.
Why This Workflow
Models You Need to Use
In my previous test Wan 2.1 FusionX ComfyUI Workflow , I used two models:
- Text-to-Video (T2V) — for generating videos from text prompts.
- Image-to-Video (I2V) — for animating reference images.
The key addition is the WanVideo Vance model node . You’ll need to:
Workflow Nodes
So yeah, let’s dig into how this workflow actually works in ComfyUI.
There are two main nodes you need to understand:
By default, the frame load is set to 125 frames , which equals about a 5-second video . If you want something longer, just increase that number. Easy enough.
Then both of those get sent through the Resize Image v2 node . This lets you set the resolution you want to generate at. For example, I used 1024×576 , but my source video wasn’t exactly that size. So I toggled “keep proportion” and selected “stretch” in preview mode. That way I could still capture all the movement clearly — like the dance steps I was testing with.
Motion Capture Setup
After resizing, I fed the output into both the Canny and DWPose ControlNet nodes.
Why both?
Because combining them gives better motion tracking — especially for things like dancing or sword movements. But yeah, it does eat up more VRAM.
If you’re running low on memory, here’s what you can do:
Still You will gets good results, just a bit less detailed.
And if you’re not using a reference image at all?
Now it’ll just copy the motion from your input video, and generate visuals based on your prompt. So the look will be AI-generated, not tied to any specific image.
Workflow Video

Common Errors (and How to Fix Them)
Okay, let’s talk about the errors I ran into while testing this workflow — and how I fixed them. A lot of people asked about these in comments, so I figured it’s worth covering step by step.
First thing to check:
Make sure sage attention is installed correctly. That’s a common bottleneck for this model.
If you don’t have it working:
Sometimes just turning that off gets things running smoother.
Another quick fix:
Also — if your setup includes the WanVideoBlockSwap node:
And here’s the most important one:
Final Thoughts
Alright, that’s pretty much everything I’ve tested so far with the Wan 2.1 FusionX VACE ComfyUI workflow .
Let me just say — this is one of the most flexible video workflows I’ve used in ComfyUI so far. Whether you’re animating a single image, swapping characters, or building entirely new scenes from motion input, it handles it all pretty damn well
email not get verified and not gettting the workflow to download. even i m not getting mail
Your email is verified, Just in Box add your email and click download button, you will able to download any workflow instant
Hello. I signed up my mail several days ago. But I’m not getting the mail too.