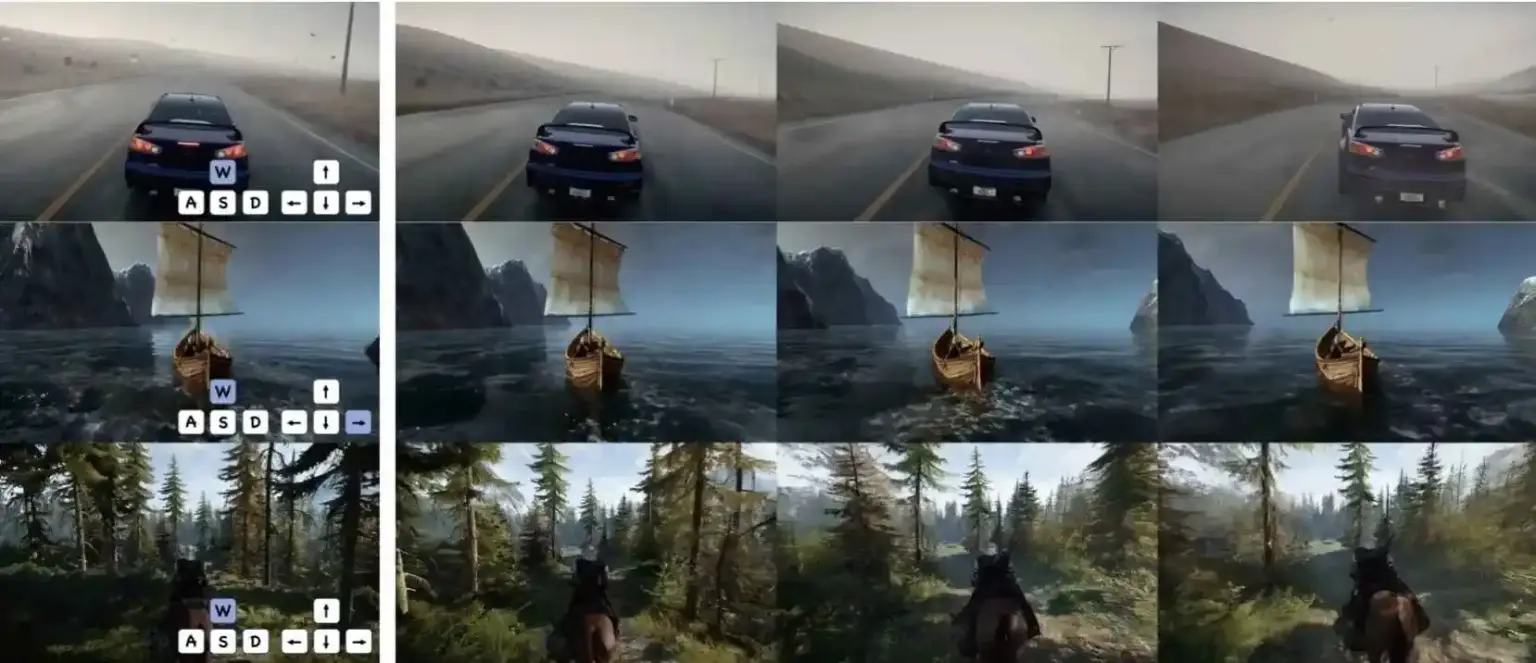
Turn one image into a moving game scene. Hunyuan-GameCraft is Tencent Hunyuan’s open-source framework on top of HunyuanVideo. You give it an image, a short prompt, and simple keys. It gives you a smooth, controllable shot.
What Hunyuan-GameCraft is (and why it matters)
Give it an image, a short prompt, and a few action keys. The system maps those inputs to a continuous camera move and uses a history step to keep the scene stable as the shot runs longer. That approach comes from the team’s paper and model card; both are public.
Let’s be real: this is open source and shippable right now. The team released inference code and model weights on Aug 14, 2025. If you want the official notes, they’re on the project site and GitHub.
What you get with Hunyuan-GameCraft
I didn’t expect this part: starting from one picture still lets you steer the camera over time.
How to Set Up Hunyuan-GameCraft (The Right Way)
If you want to run Hunyuan-GameCraft locally, the setup is simple once you know where the files go and which flags matter.
All you need is the right checkpoint, the right folder structure, and a few CLI settings.
Let’s break it down.
Which Hunyuan-GameCraft checkpoint to use?
There are two options on the model card: https://huggingface.co/tencent/Hunyuan-GameCraft-1.0/tree/main
What to pick
Start with the distilled checkpoint. It renders faster, so you can test your moves without waiting.
When the shot looks right, switch to the full checkpoint for final quality.
Each file is big (about 30 GB). Grab one first—you can pull the other later if you need it.
Where to put the files (exact structure)
You need two things under weights/:
- GameCraft checkpoint → goes in
weights/gamecraft_models/ - Stdmodels bundle (support files used by the scripts) → put the entire
stdmodels/folder as-is underweights/
Hunyuan-GameCraft-1.0/
├─ asset/
├─ hymm_sp/
├─ weights/
│  ├─ gamecraft_models/
│  │  └─ mp_rank_00_model_states.pt
│  │     # OR: mp_rank_00_model_states_distill.pt
│  └─ stdmodels/
│     ├─ ... (keep all subfolders/files exactly as provided)
│     └─ ... (CLIP / VAE / text encoders live here)
└─ ...
Important
Don’t rename subfolders inside stdmodels/.
The run scripts expect:
That’s it for model files. The rest is environment + flags.
Dependencies (clean path)
You don’t need much—just the right stack and a steady GPU.
Conda + CUDA 12.4 setup
git clone https://github.com/Tencent-Hunyuan/Hunyuan-GameCraft-1.0.git
cd Hunyuan-GameCraft-1.0

conda create -n HYGameCraft python=3.10 -y
conda activate HYGameCraft

# PyTorch for CUDA 12.4
conda install pytorch==2.5.1 torchvision==0.20.0 torchaudio==2.5.1 pytorch-cuda=12.4 -c pytorch -c nvidia

# Deps + optional FlashAttention v2 (speed)
python -m pip install -r requirements.txt
python -m pip install ninja
python -m pip install git+https://github.com/Dao-AILab/flash-attention.git@v2.6.3
Docker (optional)
A CUDA-12 image is available in the README. You can pull it and run with --gpus all if you prefer containers.
Run Hunyuan-GameCraft (multi-GPU, fast lane)
One idea per flag. No guesswork.
Example
torchrun --nproc_per_node=8 hymm_sp/sample_batch.py \
  --image-path asset/village.png --image-start \
  --prompt "medieval village, bright day" \
  --ckpt weights/gamecraft_models/mp_rank_00_model_states.pt \
  --video-size 704 1216 --cfg-scale 2.0 \
  --action-list w s d a --action-speed-list 0.2 0.2 0.2 0.2 \
  --infer-steps 50 --use-fp8
(Those paths and flags match the repo examples.)
Single-GPU, low-VRAM mode (works, just slower)
Use 24 GB at modest resolution and fewer steps/frames; consider CPU offload.
export DISABLE_SP=1
export CPU_OFFLOAD=1

torchrun --nproc_per_node=1 hymm_sp/sample_batch.py \
  --image-path asset/village.png --image-start \
  --ckpt weights/gamecraft_models/mp_rank_00_model_states.pt \
  --video-size 704 1216 --cfg-scale 2.0 \
  --action-list w a d s --action-speed-list 0.2 0.2 0.2 0.2 \
  --sample-n-frames 33 --infer-steps 50 --use-fp8
Quick previews: switch to the distilled checkpoint and drop --infer-steps to 8–12.
Make the motion feel like a camera, not key taps
Keep paths short
Use 2–4 moves at a time. Long lists wobble. If it looks busy, drop one move and stretch the others.
Ease the speed
Small changes read clean: 0.2 → 0.3 is fine. Big jumps (0.2 → 1.0) snap. If it jerks, cut the turn speed in half and try again.
Roll in before a turn
Add a tiny forward first: w 0.2. Then turn. Add another small w after. It feels like a real operator, not a snap cut.
Hold the frame between beats
Slip in a low-speed w as a spacer. It settles the shot and reduces the little “breathing” you see between moves.
Quick presets (paste and go)
Slow reveal
--action-list        w d w
--action-speed-list  0.2 0.1 0.2
I use this to open a scene. Small move forward. Tiny right nudge. Then keep moving.
If it feels too strong, drop the middle d to 0.05. Need more time on the subject? Raise the last w.
Corner turn
--action-list        w a w
--action-speed-list  0.3 0.15 0.3
Walk in, ease left, continue. Reads clean in streets and corridors.
If the turn snaps, lower the middle speed to 0.1. A quick w 0.2 before and after a smooths it out.
Subject arc
--action-list        d d w d
--action-speed-list  0.1 0.1 0.1 0.1
Slow orbit to the right with a small push-in so it doesn’t feel flat.
Want slower? Set all speeds to 0.08. Want more depth? Change the third action to w 0.2.


I had tried this workflow before when this came out and was very disappointed that it was only a testbed. You only get to put in a string of keys and wait for it to render you a video. I thought this was going to be a realtime example where the diffusion was produced realtime and reacted to my inputs. Unless I did something wrong it was pretty disappointing.
Fantastic site Lots of helpful information here I am sending it to some friends ans additionally sharing in delicious And of course thanks for your effort