
So yeah, let’s talk about FLUX.1 Kontext. This isn’t just another text-to-image model – it’s a whole new way to generate and edit images using both text and existing visuals. Black Forest Labs (BFL) dropped this recently, and honestly, it feels like a game-changer.
The big idea? You can upload an image, add a simple text prompt, and let the model do things like:
- Remove objects seamlessly
- Change weather conditions (e.g., “everything is covered in snow”)
- Adjust facial expressions
- Edit text in images (e.g., “change beer to context”)
- Convert styles (anime, line art, etc.)
All with one click.
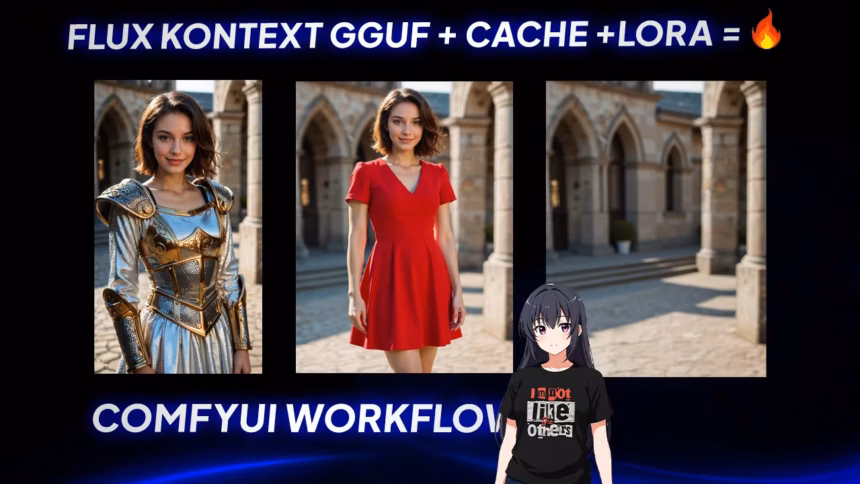
Here’s the thing – most models struggle to maintain consistency when editing images. FLUX.1 Kontext actually gets context. Upload a photo of someone, and you can tweak their outfit, environment, or expression while keeping their core identity intact. Try that with other tools, and you’ll usually end up with a mess.
What Makes FLUX.1 Kontext Different?
Let me break down the key features they highlight over at BFL:
- Character consistency : Keep unique elements (like a person’s face) consistent across edits
- Local editing : Modify specific parts of an image without wrecking the rest
- Style reference : Preserve artistic styles from a reference image while generating new scenes
- Interactive speed : Fast results – up to 8x faster than some leading models
- Iterative editing : Build on previous edits step-by-step without losing quality
I tested this with a simple example. Uploaded an image of a woman, then told it “remove the thing from her face.” Poof – gone. Then I added “she’s now taking a selfie in Freiburg on a lovely day.” Perfect. Even tried “it’s now snowing” – and yep, everything was covered in snow. No finetuning, no complex workflows. Just plain text instructions.
The BFL Playground – Try Before You Commit
If you’re not ready to dive into local setups yet, check out the BFL Playground . It gives you 200 free credits to experiment with FLUX.1 Kontext[pro] and other advanced models. No credit card needed – just click, play, and see what it can do.
This is huge for teams evaluating use cases or showing stakeholders quick proofs of concept. Want to demo how the model handles iterative edits? Or test its typography generation? The Playground makes it dead simple before committing to API integration.
Models Available – Which One Fits Your Setup?
There are three main versions of FLUX.1 Kontext:
- [pro] : Fast, iterative editing (available via BFL partners like LeonardoAI)
- [max] : Highest performance with better prompt adherence (experimental)
- [dev] : Open-weight variant for research (private beta – contact BFL for access)
For local use in ComfyUI, you’ll want the [dev] version
Setting Up FLUX.1 Kontext[dev] in ComfyUI
So yeah, let’s get back to setting up FLUX.1 Kontext[dev] in ComfyUI. If you’re new to this workflow or just looking for a refresher, this part covers the actual installation steps and how to optimize your setup based on your hardware specs.
First off — if you haven’t already downloaded the model file from Hugging Face, go do that now. It’s completely free to use since it’s open-source, but you’ll need to request access through the Hugging Face interface. Once approved, you can grab either the GGUF version (for low VRAM systems) or the FP8/safetensors format if you’ve got more GPU memory to spare.
Here’s what I used:
- GGUF if you’re on a low VRAM machine (RTX 3060 or lower)
- FP8/safetensors if you’ve got mid-to-high VRAM (RTX 4070 and above)
- Full dev model if your system can handle it
Once downloaded, just drop the model file into your ComfyUI models/diffusion_models folder. That’s literally all you need to do for the base install.
Now, here’s where things get interesting.
LoRA Support
If you want to generate results in 8 steps instead of 30, you can use this LoRA.
Here’s an example:
- LoRA File : FLUX.1-Turbo-Alpha
- Location : ComfyUI/models/loras/
Once added, just drag the “Apply LoRA” node into your workflow and select the LoRA you want to use. No extra configuration needed — just plug and play.
Speed Boosters – Tea Cache and MagCache
These two nodes are absolute game-changers when it comes to performance. They drastically reduce times.
TeaCache . If you’re using FLUX.1 Kontext or any advanced diffusion model in ComfyUI, this node can save you a lot of time. Instead of recomputing everything from scratch every time, TeaCache stores and reuses stable parts of the image generation process.
TeaCache identifies which parts of the image aren’t changing much and skips redoing that work. That means faster results without noticeable quality loss.
This is super useful when:
- Doing multiple edits on the same image
- Trying different prompts with similar inputs
- Batch-generating variations of the same scene
Magcache node it works by monitoring the magnitude of changes between consecutive model outputs during the generation process.
Here’s what that means:
- If the model output doesn’t change much between two steps, MagCache skips redoing that work
- It stores and reuses the previous result instead
This makes the whole process faster — sometimes 2x or more , depending on the model and settings.
Both do similar things — skip redundant steps to speed up generation — but they use different signals to decide when to cache and reuse data.
In practice, I recommend testing both and seeing which one gives you better results based on your specific workflow and hardware setup.
Where to Place Each Model File
I’ve tested multiple setups while working through this workflow, and here’s the exact folder structure that works best for FLUX.1 Kontext[dev]:
Let me break down what each file does and where you should put it.
Diffusion Model
This is the main image generation engine. You can grab either the FP8 version for better quality or the GGUF version if you’re using low VRAM hardware.
- FP8 : flux1-dev-kontext_fp8_scaled.safetensors
- GGUF : FLUX.1-Kontext-dev-GGUF
- Full: flux1-kontext-dev.safetensors
Place whichever version you choose inside ComfyUI/models/diffusion_models/.
VAE
The VAE helps with decoding latent space into visible images. It affects output quality and sharpness — so don’t skip this one.
- File : ae.safetensors
- Location : ComfyUI/models/vae/
Make sure you rename it exactly as shown — ae.safetensors. Any other name might cause issues later.
Text Encoders
These two files help interpret your prompts and generate accurate results. They work together to understand both short and long descriptions.
- CLIP_L : clip_l.safetensors
- T5XXL : Use either t5xxl_fp16.safetensors or t5xxl_fp8_e4m3fn_scaled.safetensors
Place both inside ComfyUI/models/text_encoders/.
If you want to use the GGUF version of T5XXL instead, you can download it from here . Just make sure you adjust the workflow accordingly by enabling the GGUF loader node.
Final Thoughts – Is FLUX.1 Kontext Worth It?
After putting this model through its paces, I’d say yes — especially if you’re working with image editing, product placement, fashion design, or content creation that requires consistency across multiple variations.
It handles tasks like object removal, weather transformation, clothing swaps, and text editing with minimal input. And with the advanced ComfyUI workflow, you can scale this into production-level pipelines without breaking a sweat.
The open-source [dev] version is perfect for experimentation and customization. The paid [pro] and [max] versions offer even better performance and speed — ideal for professional use cases.


I get an error message when I try to download the workflow. Can you just send it to me? Or make it so that the link works properly? I tried in Edge and Chrome
unable to download workflow. I’ve entered a gmail-address, but it says: Failed to send verification email. Please try again.
tanks